This is an old revision of the document!
Swift Kickstart with Rclone (demo)
This document is a recipe showing how to use a swift client called RClone . Swift is in preview mode and should not be used for anything important. The current cluster will be destroyed and data may be removed without notice 1) . Additionally, you will need to have a conversation with Techstaff to setup a project scope before you can follow these instructions.
All of the data fed to the cluster should be also saved elsewhere, and you are advised against relying solely on this service at this time.
Obtain Application Credentials
1 Login to Web Application
First, accept the certificate and login to The Dashboard with your CNetID and password.
important: Write csldap in the domain field of the login page.
2 Create Application Credentials
Using the menu on the left, select "Identity → Application Credentials" to access the Application Credentials Interface
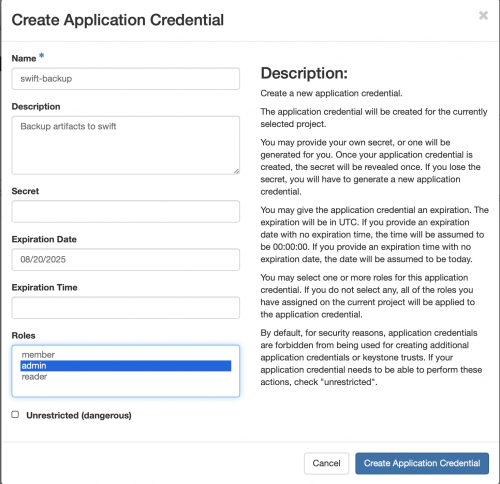
interface. Click the "+ Create Application Credential" button and fill out the form.
Be sure to download the application credentials after submitting the form
Credentials Advice:
- Make the expiration date memorable such as your birthdate.
- Leave
Secretblank - Give your application
adminRole (*not* unrestricted). - Read the guide text on the form page
3 Install and Configure rclone
RClone is a swift client used as an example in this guide. Download and install rclone using the Install Guide . For this example, rclone binary was simply untared.
Configuration of rclone should be simplified as below
$ cat ~/.config/rclone/rclone.conf
[techstaff]
type = swift
env_auth = true
auth_version = 3
Save your Application Credentials that you downloaded in the previous step, and include them in your shell's environment before running rclone. In the below example, everything that I would like to save is already in a local directory path /home/chudler/backup_data . The remote location was named techstaff in the above configuration file.
source ~/app-cred-swift-backup-test-openrc.sh
./rclone sync /home/chudler/backup_data techstaff:backup_current --backup-dir techstaff:backup_$(date -I)
Troubleshooting
- Rcode returns 404 after/during authentication. Change the application environment file
OS_AUTH_URLvariable, as below.
export OS_AUTH_URL=https://overcloud.cs.uchicago.edu:13000/v3

